X-Carve: Example Geometry

From Spark Makerspace
Revision as of 19:37, 18 February 2023 by Dan (talk | contribs)
Jump to navigation Jump to search

This tutorial will guide a new user through the basic steps of using the X-Carve Router. The project will be a small round tuit out of multi-color HDPE plastic.

Start A New Project

See also: X-Carve: Easel

  1. If you haven't already, create an Easel account by following the steps on X-Carve: Easel page.
    1. Make sure to set up the Spark X-Carve in the new account
  2. Go to https://easel.inventables.com/users/sign_in and sign in
  3. Start a new project using the green button in the upper right of the Easel Start Screen
  4. Easel will bring you to the Easel Main Screen

Define Project Material

See also: X-Carve: Easel - Materials

Step 1:
WS X-Carve MaterialButton.png
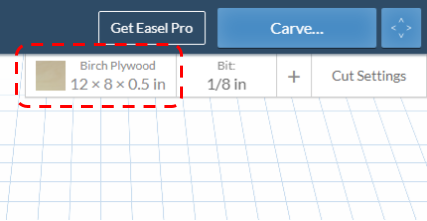
  1. The first step is to define the workpiece material. Start by clicking on the Materials button in the upper right corner of the Easel window.
Step 2:
WS X-Carve ClassMaterialMarkup.png
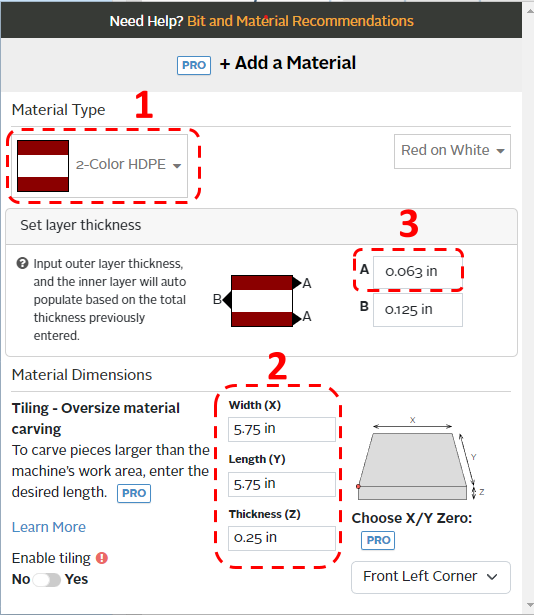
  1. Use the dropdown menu to select 2-Color HDPE.
    • If preferred, you can also match the color to the class workpiece using the second dropdown menu to the right, but it will not affect the cut settings.
  2. Set the Width (X) and Length (Y) to 5.75 inches, and the Thickness (Z) to 0.25 inches
  3. Set the outer layer thickness in field A to 0.063 inches.
    • The inner layer thickness value infield B will be automatically calculated
  4. Click the Material button again, or outside the popup window, to close the Material popup window.


Set Project Cutting Bit

See also: X-Carve: Easel - Cutters

Step 1:
WS X-Carve BitButtonMarkup.png
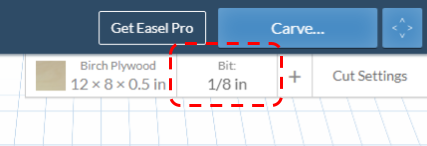
  1. Once the material has been defined, the next step is to define the cutting tool, or "cutter", which may also called "bit", as Easel does. Start defining the cutting bit by clicking on the Bit button in the upper right corner of the Easel Window.
Step 2:
WS X-Carve ClassCuttingBit.png
  1. Choose the 1/16 Fishtail Spiral bit from the list.
    • If the correct bit is not shown on the list, follow the steps on the cutter page to add it.
  2. Click the Bit button again, or outside the popup window, to close the Bit popup window.

Set Project Feeds and Speed

See also: X-Carve: Easel - Depths and Speeds

Step 1:
WS X-Carve CutSettingButton.png
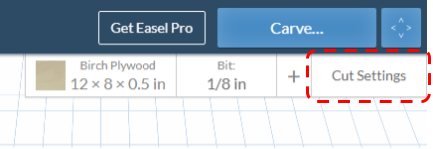
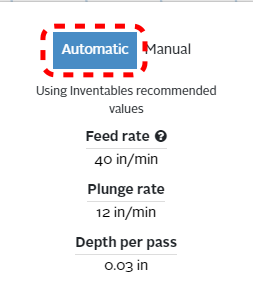
  1. This class will use the default settings for cutting feed rate and spindle speeds, which Easel will set automatically based on the material and cutter choices. Click on the Cut Settings button in the upper right corner of the Easel window.
Step 2:
WS X-Carve ClassCutSettings.png
  1. Ensure that the Automatic option is highlighted blue by clicking on it.
    • Feed settings should be similar to the ones shown at left

Define Project Geometry and Features=

See also: X-Carve: Easel - Geometry, X-Carve: Easel - Features

Each project is built out of a series of gometric shapes, which are used to define the cutting features. Easel uses the terms Shape for geometry, and Cut for features. Easel allows three types of features: profiles, pockets, and drilled holes.

There are three steps in creating the round tuit, and each step uses a different feature.

Outside Circle

Step 1:
WS X-Carve ClassGeometryCircleMarkup.png
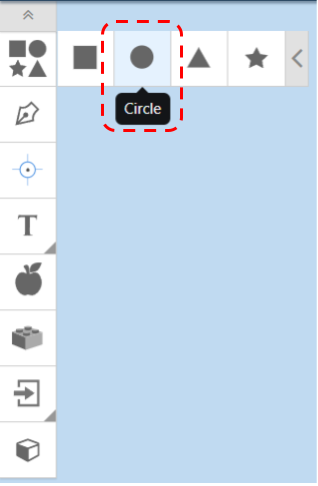
  1. Start with defining the geometry of the outer shape of the tuit. On the left side of the Easel window, find the Geometry toolbar
    • The tool bar may be hidden. Click the grey box with two chevrons in it, in the upper left corner of the Easel window, to show the toolbar.
  2. Click the top Shapes box to expand the selection of default shapes
  3. Choose the Circle option, and Easel will insert a circle in your CAM workspace
Step 2:
WS X-Carve ClassCircleGeometryMarkup.png
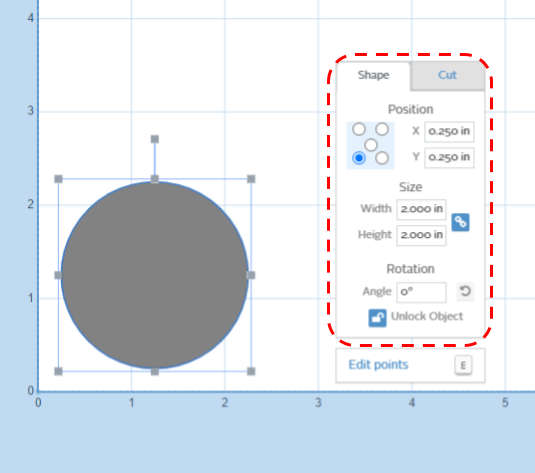
  1. Once the circle is placed, it can be manipulated using the mouse or using the Shape tab in the pop-up window.
  2. Use the Shape tab to set the circle:
    1. Find the Position control which looks like you rolled a 5 on a die. Click the lower left corner button
    2. Set the X Position to 0.250 inches
    3. Set the Y Position to 0.250 inches
    4. Set the Width to 2.000 inches
    5. Set the Height to 2.000 inches
    6. Set the Angle of rotation to zero degrees
    7. Click the Lock logo at the bottom to lock the circle in position. This will prevent it from being accidently moved as you work on other parts of the project.
Step 3:
WS X-Carve ClassCircleFeatureMarkup.png
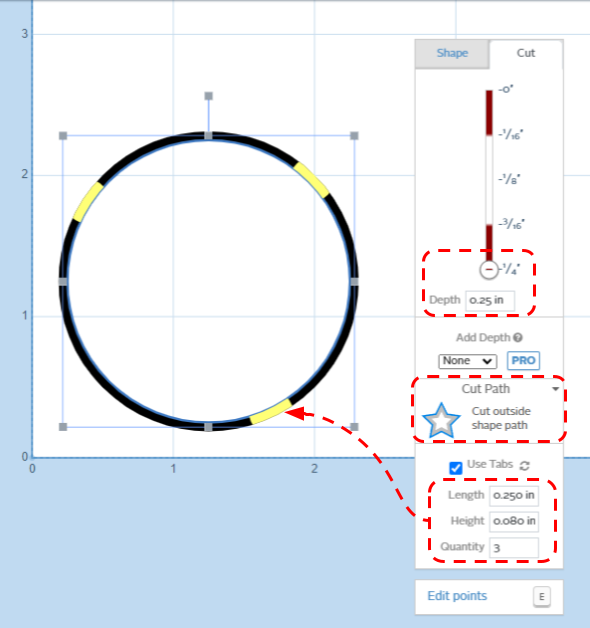
  1. Now that the Geometry is set, you need to define the feature which will be cut. The default feature is a shallow pocket, as is visible in the simulation portion of the Easel window. Because this is the outside surface of the tuit, you will need to set the feature as a profile cut all the way through the part.
  2. With the circle geometry selected, click on the Cut tab in the popup window
  3. Use the Cut tab to set the the profile feature:
    1. Set the depth to 0.250 inches
      • This can be done either by using the slider, or by typing into into the Depth box
    2. The Cut Path area currently reads "Cut out a pocket". Click on it, and choose Cut outside shape pocket
      • Because Easel now knows you're cutting your project out of the rest of the workpiece, it will automatically add the Use Tabs box to the bottom of the popup window.
    3. Ensure the Use Tabs box is checked (it should be on by default)
    4. The default options for tab Length of 0.250 inches and tab Height of 0.080 inches will work fine
    5. Set the tab Quantity down to 3
      • The tabs are visible in the CAM workspace as yellow bars on the black circle. They can be moved with the mouse by clicking and dragging.
      • Tabs will not be shown in the Simulation portion of the Easel window, though they will be present in the tool paths.


Text

Step 1:
WS X-carve ClassGeometryFontsMarkup.png
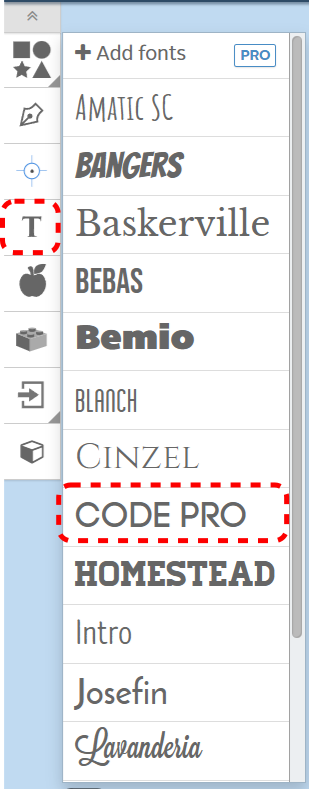
  1. It's now time to define the text of the tuit. Start by choosing the T (for Text)button on the Geometry toolbar.
  2. The available fonts are shown. For this example, choose CODE PRO from the pop-up window.
  3. TEXT will show up on your screen. Don't worry about the size right now. Choose the test, delete the exiting letters, and type TUIT in the text box.
Step 2:
WS X-Carve ClassTextGeometryMarkup.png
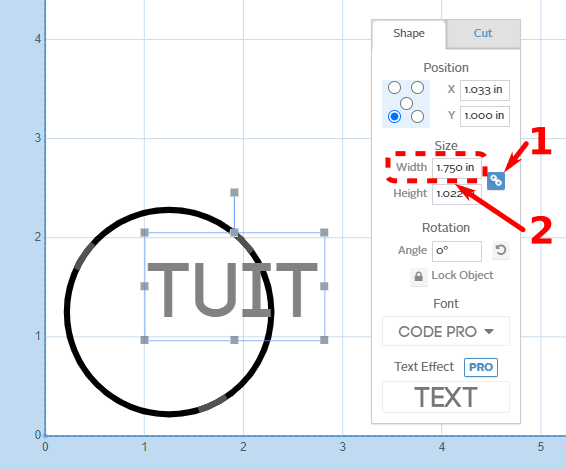
  1. The text is too large to fit within the outline of the tuit. Start the resizing process by clicking on the text to select it, then click the Link button in the Shape tab of the pop-up window.
    • The link button ensures that the current ratio of height to width is maintained. Changing either the height or the width will automatically change the other to maintain the same proportions.
  2. Change the Width of the text to 1.75 to fit within the 2-inch circle of the tuit. The Height should change automatically to match the image to the left.
Step 3:
WS X-Carve ClassCircleFeatureMarkup.png