Difference between revisions of "X-Carve: Example Geometry"
Jump to navigation
Jump to search
| Line 27: | Line 27: | ||
| | | | ||
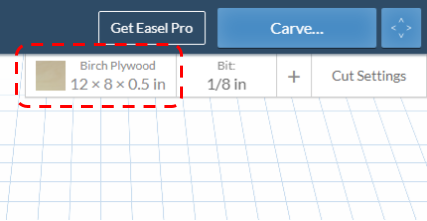
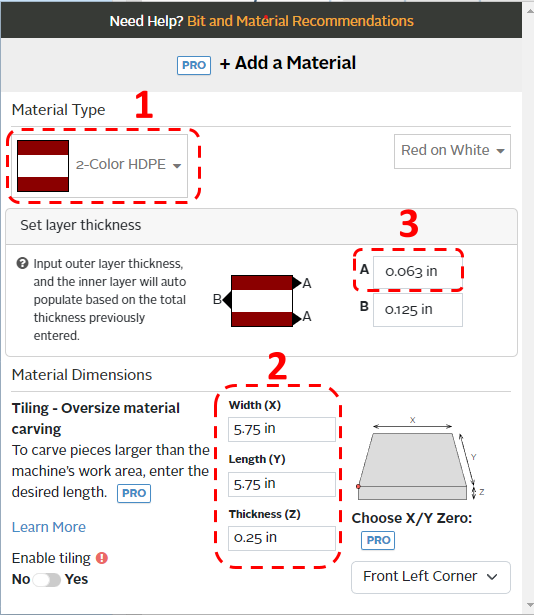
# Use the dropdown menu to select '''2-Color HDPE'''. | # Use the dropdown menu to select '''2-Color HDPE'''. | ||
| − | #* If preferred, you can also match the color to the class workpiece using the second dropdown menu to the right, but it will not affect the cut settings. | + | #* If preferred, you can also match the color to the class workpiece using the second dropdown menu to the right, but it will not affect the cut settings. This example uses red and white for contrast; the class colors will vary. |
# Set the Width (X) and Length (Y) to '''5.75 inches''', and the Thickness (Z) to '''0.25 inches''' | # Set the Width (X) and Length (Y) to '''5.75 inches''', and the Thickness (Z) to '''0.25 inches''' | ||
# Set the outer layer thickness in field A to '''0.063 inches'''. | # Set the outer layer thickness in field A to '''0.063 inches'''. | ||
| Line 125: | Line 125: | ||
|- | |- | ||
! scope="row" | Step 1: | ! scope="row" | Step 1: | ||
| − | |[[file:WS X-carve ClassGeometryFontsMarkup.png| | + | |[[file:WS X-carve ClassGeometryFontsMarkup.png|x448px|center|border]] |
| | | | ||
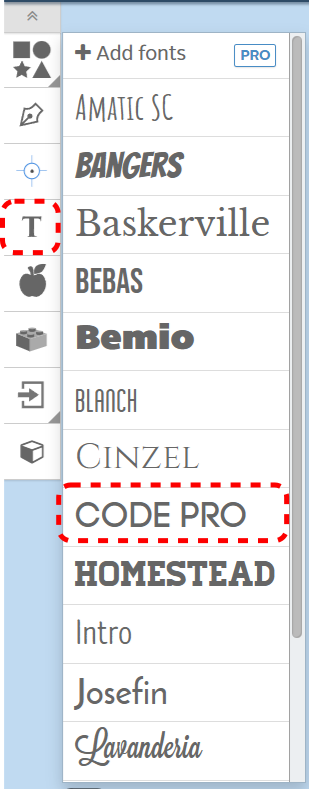
# It's now time to define the text of the tuit. Start by choosing the '''T''' (for '''Text''')button on the Geometry toolbar. | # It's now time to define the text of the tuit. Start by choosing the '''T''' (for '''Text''')button on the Geometry toolbar. | ||
| Line 136: | Line 136: | ||
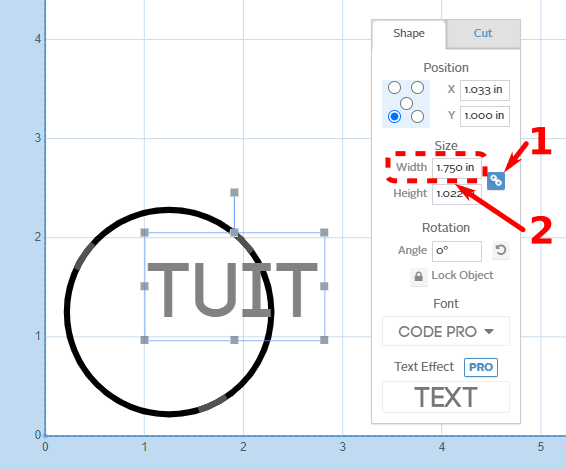
# The text is too large to fit within the outline of the tuit. Start the resizing process by clicking on the text to select it, then click the '''Link button''' in the Shape tab of the pop-up window. | # The text is too large to fit within the outline of the tuit. Start the resizing process by clicking on the text to select it, then click the '''Link button''' in the Shape tab of the pop-up window. | ||
#* The link button ensures that the current ratio of height to width is maintained. Changing either the height or the width will automatically change the other to maintain the same proportions. | #* The link button ensures that the current ratio of height to width is maintained. Changing either the height or the width will automatically change the other to maintain the same proportions. | ||
| − | # Change the Width of the text to '''1.75''' to fit within the 2-inch circle of the tuit. The Height | + | # Change the Width of the text to '''1.75 inches''' to fit within the 2-inch circle of the tuit. The Height will change. |
| − | + | #* You can try changing the width to 1.25 inches, and noting the effect on the simulation portion on the right of the Easel window. When the text is this small, the currently defined cutting bit can't fit into inside the letters, except for in a few locations. While the text is still visible in the CAM portion of the window on the left, it's gone from the simulation portion on the right. | |
| + | #* Return the Width value to 1.75 inches, and the text will reappear in the simulation portion of the window. | ||
|- | |- | ||
! scope="row" | Step 3: | ! scope="row" | Step 3: | ||
| − | | [[file:WS X-Carve | + | |[[file:WS X-Carve ClassGeometriesSelected.png |center]] |
| + | | | ||
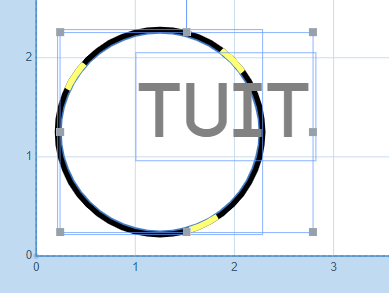
| + | # To center the text, select the text box (if not already selected) by clicking on it. | ||
| + | # Hold the '''Shift''' key on the keyboard, and select the circle by clicking on it. | ||
| + | #* The two items may also be selected by dragging a highlight box around all or part of the geometries with the mouse. | ||
| + | #* The highlight box will select everything it touches, which can result in unintentionally selecting geometries in a crowded area. Use with care! | ||
| + | |- | ||
| + | ! scope="row" | Step 4: | ||
| + | |[[file:WS X-Carve GeometryAlignmentToolbarMarkup.png|center]] | ||
| + | | | ||
| + | # The Geometry Alignment toolbar will appear on the top of the CAM portion of the Easel window. Clicking the '''Center Horizontally''' and '''Center Vertically''' buttons will place the text in the center of the circle. | ||
| + | #* In this case, you previously locked the circle in place, so only the text moved. If the circle position had not been locked, both geometries may have moved to allow the alignment. | ||
| + | |- | ||
| + | ! scope="row" | Step 5: | ||
| + | | [[file:WS X-Carve ClassTextFeatureMarkup.png|center]] | ||
| | | | ||
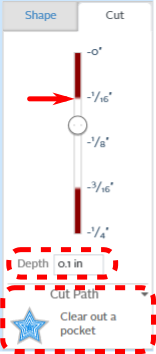
| − | # | + | # Ensure that only the text is selected. Click on the '''Cut''' tab of the pop up window. |
| + | #* Changes to feature definitions made in the Cut tab will affect all selected geometries. | ||
| + | # Set the Depth to '''0.1 inches''' | ||
| + | #* The exact depth value is not very important, but it should be deeper than the topmost layer of plastic. The resulting color contrast between the top and middle layers is important for legibility. | ||
| + | #*The border between the layers is shown on the slider above the depth box, identified by a red arrow in the image to the left. | ||
| + | # The Cut Path should be '''Clear out a pocket''' by default. If it's not, use the Cut Path dropdown to choose the correct option. | ||
|} | |} | ||
Revision as of 20:32, 18 February 2023
This tutorial will guide a new user through the basic steps of using the X-Carve Router. The project will be a small round tuit out of multi-color HDPE plastic.
Start A New Project
See also: X-Carve: Easel
- If you haven't already, create an Easel account by following the steps on X-Carve: Easel page.
- Make sure to set up the Spark X-Carve in the new account
- Go to https://easel.inventables.com/users/sign_in and sign in
- Start a new project using the green button in the upper right of the Easel Start Screen
- Easel will bring you to the Easel Main Screen
Define Project Material
See also: X-Carve: Easel - Materials
| Step 1: |
| |
|---|---|---|
| Step 2: |
|
Set Project Cutting Bit
See also: X-Carve: Easel - Cutters
| Step 1: |
| |
|---|---|---|
| Step 2: |
|
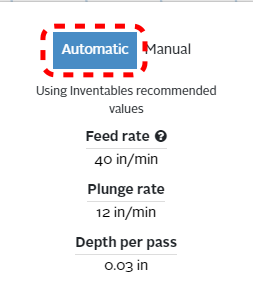
Set Project Feeds and Speed
See also: X-Carve: Easel - Depths and Speeds
| Step 1: |
| |
|---|---|---|
| Step 2: |
|
Define Project Geometry and Features=
See also: X-Carve: Easel - Geometry, X-Carve: Easel - Features
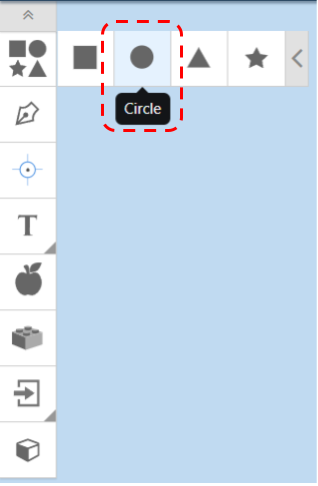
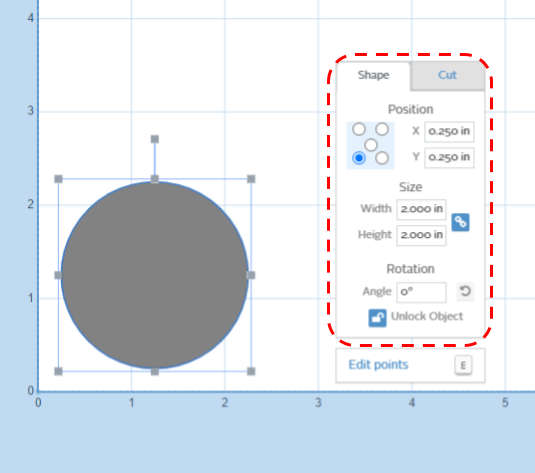
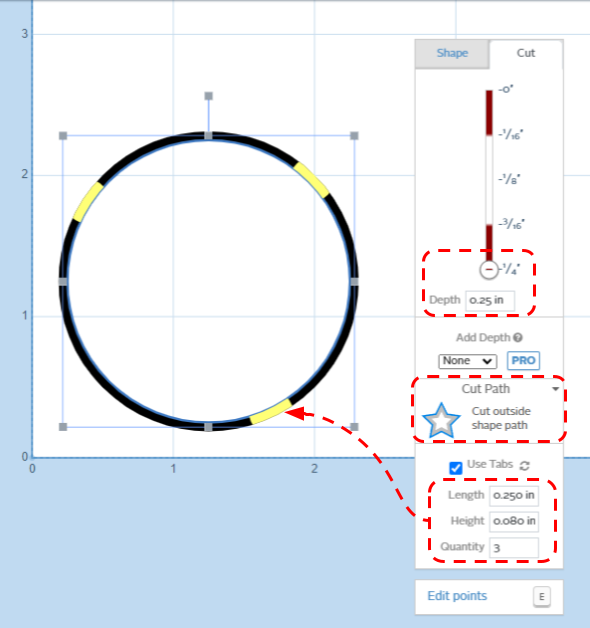
Each project is built out of a series of gometric shapes, which are used to define the cutting features. Easel uses the terms Shape for geometry, and Cut for features. Easel allows three types of features: profiles, pockets, and drilled holes.
There are three steps in creating the round tuit, and each step uses a different feature.
Outside Circle
| Step 1: |
| |
|---|---|---|
| Step 2: |
| |
| Step 3: |
|
Text
| Step 1: |
| |
|---|---|---|
| Step 2: |
| |
| Step 3: |
| |
| Step 4: |
| |
| Step 5: |
|
