Difference between revisions of "X-Carve: Example Geometry"
Jump to navigation
Jump to search
(Still a work in progress.) |
|||
| Line 117: | Line 117: | ||
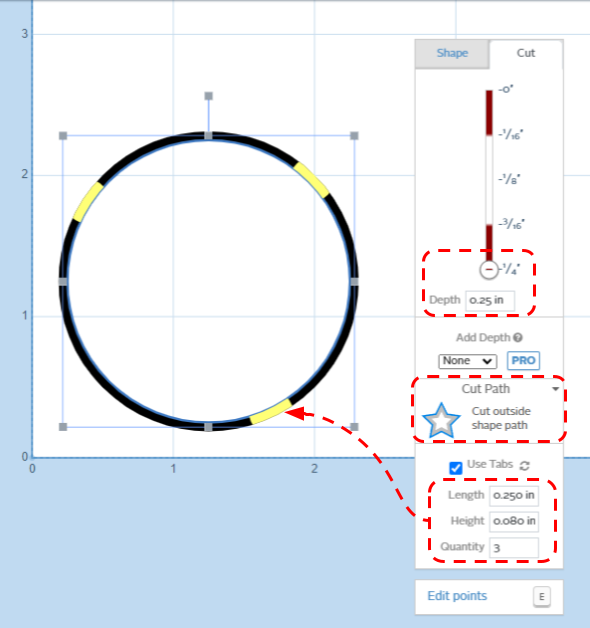
##* The tabs are visible in the CAM workspace as yellow bars on the black circle. They can be moved with the mouse by clicking and dragging. | ##* The tabs are visible in the CAM workspace as yellow bars on the black circle. They can be moved with the mouse by clicking and dragging. | ||
##* Tabs will not be shown in the Simulation portion of the Easel window, though they will be present in the tool paths. | ##* Tabs will not be shown in the Simulation portion of the Easel window, though they will be present in the tool paths. | ||
| + | |} | ||
| + | |||
| + | |||
| + | ===Text=== | ||
| + | |||
| + | {| class="wikitable" | ||
| + | |- | ||
| + | ! scope="row" | Step 1: | ||
| + | |[[file:WS X-carve ClassGeometryFontsMarkup.png|x400px|center|border]] | ||
| + | | | ||
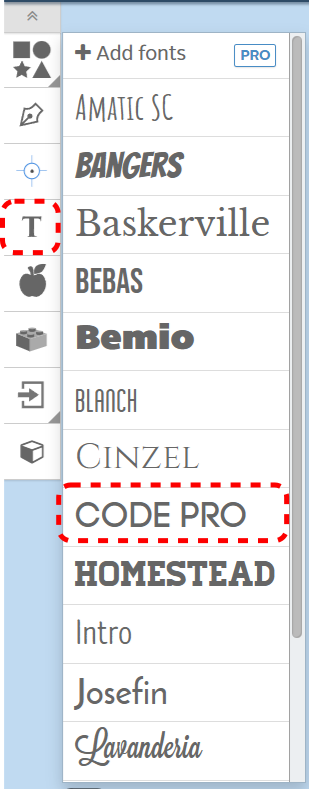
| + | # It's now time to define the text of the tuit. Start by choosing the '''T''' (for '''Text''')button on the Geometry toolbar. | ||
| + | # The available fonts are shown. For this example, choose '''CODE PRO''' from the pop-up window. | ||
| + | # TEXT will show up on your screen. Don't worry about the size right now. Choose the test, delete the exiting letters, and type '''TUIT''' in the text box. | ||
| + | |- | ||
| + | ! scope="row" | Step 2: | ||
| + | | [[file:WS X-Carve ClassTextGeometryMarkup.png|center]] | ||
| + | | | ||
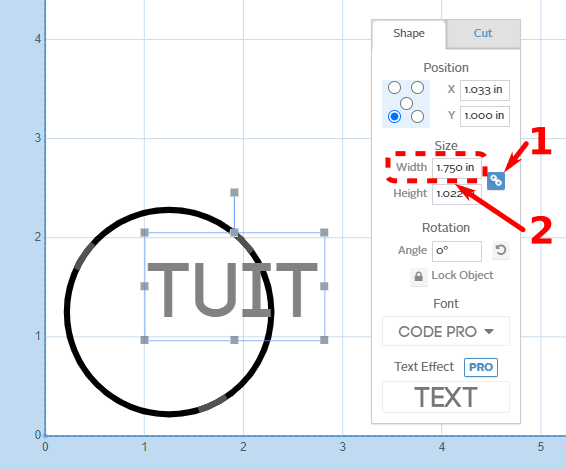
| + | # The text is too large to fit within the outline of the tuit. Start the resizing process by clicking on the text to select it, then click the '''Link button''' in the Shape tab of the pop-up window. | ||
| + | #* The link button ensures that the current ratio of height to width is maintained. Changing either the height or the width will automatically change the other to maintain the same proportions. | ||
| + | # Change the Width of the text to '''1.75''' to fit within the 2-inch circle of the tuit. The Height should change automatically to match the image to the left. | ||
| + | |||
| + | |- | ||
| + | ! scope="row" | Step 3: | ||
| + | | [[file:WS X-Carve ClassCircleFeatureMarkup.png|center]] | ||
| + | | | ||
| + | # | ||
|} | |} | ||
Revision as of 19:37, 18 February 2023
This tutorial will guide a new user through the basic steps of using the X-Carve Router. The project will be a small round tuit out of multi-color HDPE plastic.
Start A New Project
See also: X-Carve: Easel
- If you haven't already, create an Easel account by following the steps on X-Carve: Easel page.
- Make sure to set up the Spark X-Carve in the new account
- Go to https://easel.inventables.com/users/sign_in and sign in
- Start a new project using the green button in the upper right of the Easel Start Screen
- Easel will bring you to the Easel Main Screen
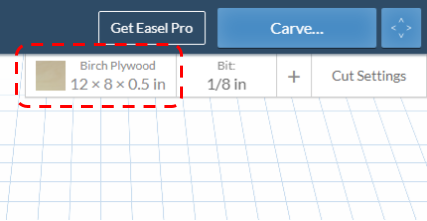
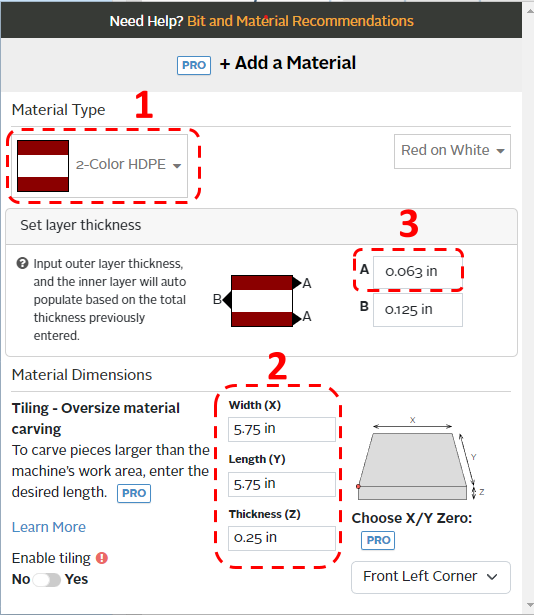
Define Project Material
See also: X-Carve: Easel - Materials
| Step 1: |
| |
|---|---|---|
| Step 2: |
|
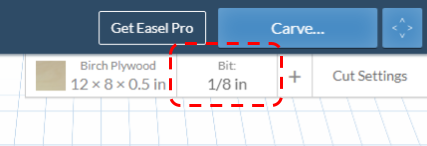
Set Project Cutting Bit
See also: X-Carve: Easel - Cutters
| Step 1: |
| |
|---|---|---|
| Step 2: |
|
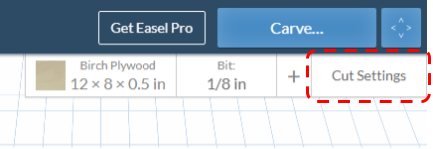
Set Project Feeds and Speed
See also: X-Carve: Easel - Depths and Speeds
| Step 1: |
| |
|---|---|---|
| Step 2: |
|
Define Project Geometry and Features=
See also: X-Carve: Easel - Geometry, X-Carve: Easel - Features
Each project is built out of a series of gometric shapes, which are used to define the cutting features. Easel uses the terms Shape for geometry, and Cut for features. Easel allows three types of features: profiles, pockets, and drilled holes.
There are three steps in creating the round tuit, and each step uses a different feature.
Outside Circle
| Step 1: |
| |
|---|---|---|
| Step 2: |
| |
| Step 3: |
|
Text
| Step 1: |
| |
|---|---|---|
| Step 2: |
| |
| Step 3: |
|
